Sonobus
Sonobus is a free easy to use application and AUv3 plug-in for streaming high-quality, low-latency peer-to-peer audio between devices over the internet or a local network.
It can be used to stream one or more audio streams between networked devices (desktop and mobile) and can even be used to on an iPad or iPhone to stream to itself in order to get audio streams into and out of apps that support AUv3 but not IAA or Audiobus protocols.
At this writing (March 2021), Sonobus for iOS is available through a public beta through the Sonobus web site.
Mac-to-iPad/iPhone Fast Connections
For fast low-latency connections between and iOS device and a MacOS device, you can establish a network connection over a direct USB connection. In order to do this, go to the System Preferences on your MacOS device and turn on Sharing→Content Caching and turn on the Internet Connection option. Now, if you connect your iPad/iPhone to your Mac using a USB cable (for lightning based devices, use your USB/Lightning charging cable).
Self-Streaming with Sonobus
You can use Sonobus to get audio into or out of an app that supports AUv3 plugins but doesn't support IAA or Audiobus. For instance, you can can pipe your guitar from AUM into NanoStudio 2 where you can then record the audio into something like MultiTrack Recorder or ENSO or another AUv3 looper/sampler to workaround NanoStudio 2's lack of audiotracks. You can also use it to get 'stems' out of GarageBand into AUM.
There are a few ways that you can set up self-sending.
Private Group. The simplest way is to use a Private Group. For the group name, enter the group name that all the Sonobus instances will connect to. For example, “myGarageBandSession”. For the Your Displayed Name field, it is useful to use an identifier that will let you recognize what track is being sent/received. If you are sending multiple streams (such as when you went to send multiple tracks out of GarageBand), you may want to use the instrument name. This method requires that wifi is active, but if you are self-sending the packets actually will stay local without going to the router.
Connect to Raw Address. Sonobus will let you connect directly to another Sonobus instance directly even if wifi is turned off. For people that need to have wifi off, this method is convenient because you can enter use the address 127.0.0.1 which means “send to the device I am on” which works even if wifi is off. When you tap on “Connect to Raw Address”, Sonobus displays the unique address of the instance you are editing. The unique local address consists of the device's IP number (which will look like something like 192.168.1.05) a colon (:) and 5-digit number. The 5-digit number is called a port number. It allows each instance on the same device to have a unique identifier. When using Connect to Raw Address, you will enter as Host the IP address and port number of the Sonobus instance you want to connect to. Don't enter the the Local Address as the Host, use the Local Address of a different Sonobus instance. The IP number will be the same for both instances, but they will have different port numbers.
Multi-Channel Sending
In an app such as AUM that supports multi-out AUv3 instances, you can stream multiple channels of audio through a single Sonobus stream rather than using an instance of Sonobus for each stream. The multi-channel send is more efficient than multiple single-channel sends.
Multi-Channel Setup Overview - AUM
The steps below are for AUM but will work in any host that supports Multi-Bus AUv3s. Illustrations are shown in the next section.
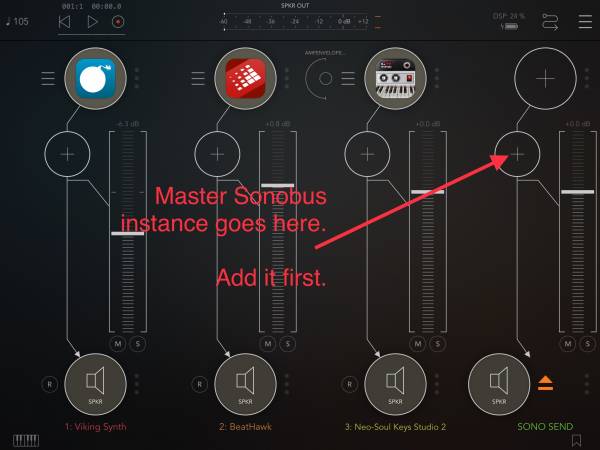
- In the sending app, create a channel strip that will hold the “master” Sonobus instance that will actually send the channels. Add Sonobus as an Effect node on this bus.
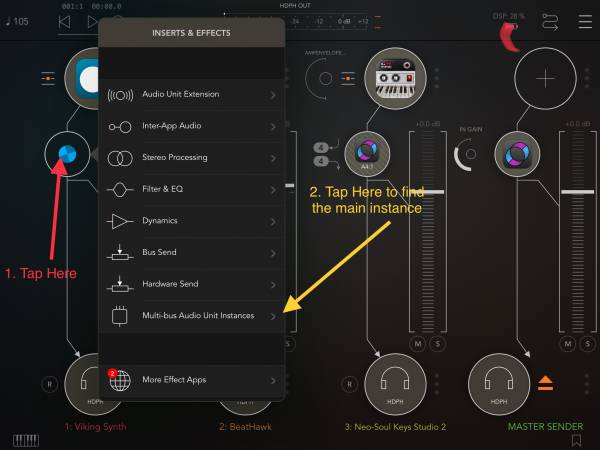
- On each channel in your session that you want to send, add an effect node at the end of your effects chain and load Sonobus from the list of Mult-Bus Audio Unit Instances. Its name will be something like “Sonobus @A1:1” (which means something like the Sonobus on Audio Strip 1 in Node 1).
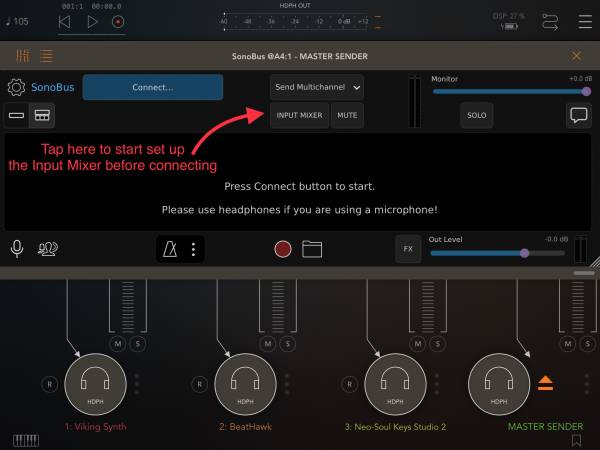
- After adding all your Sonobus instances, set up the “Input Mixer” in the master Sonobus instance and then connect it to the world.
Multi-Channel Setup Illustrated - AUM
Adding the Sonobus Instances
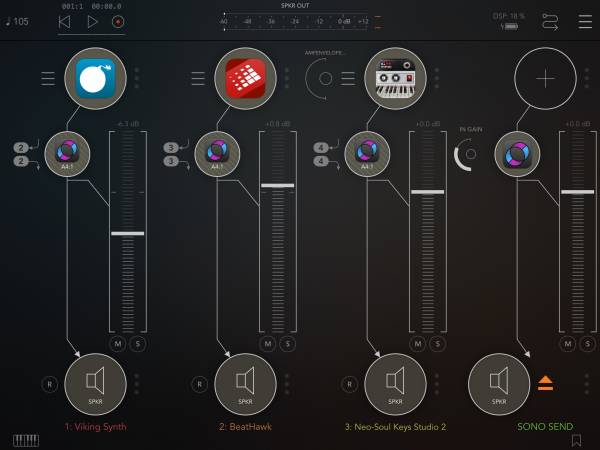
After you have added all your 'child' Sonobus instances, you should see something like this:
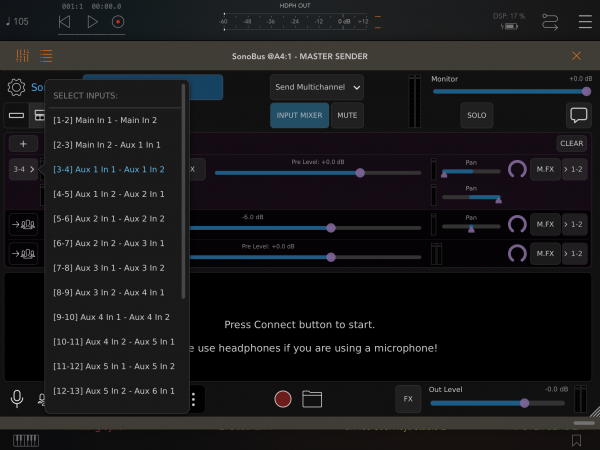
Notice that the child instances have numbers next to them that identify them as : 2, 3, 4. When you are setting up the Input Mixer in the master 2, 3, and 4 correspond to Aux 1, Aux 2, and Aux 3.
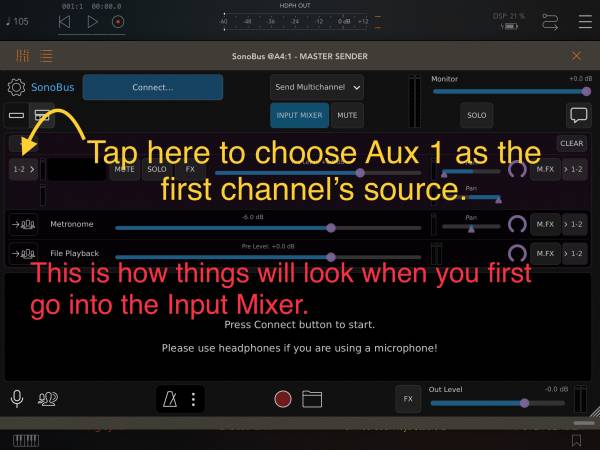
Setting up the Input Mixer in the Master Instance
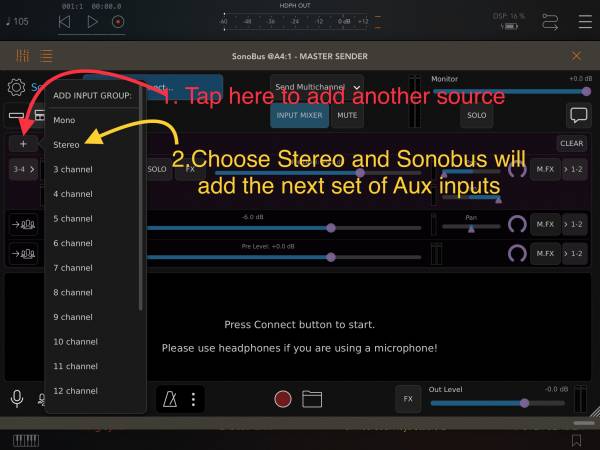
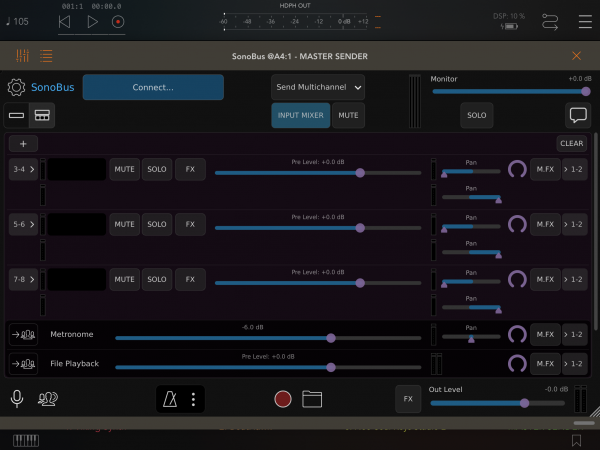
In the master Sonobus instance that actually sends the audio out, you need to bring in each of the sources that you want to send out. In the Sonobus receivers, the receiver will be able to grab whichever of the sources are needed.
After you have added all your buses, you will have something like this:
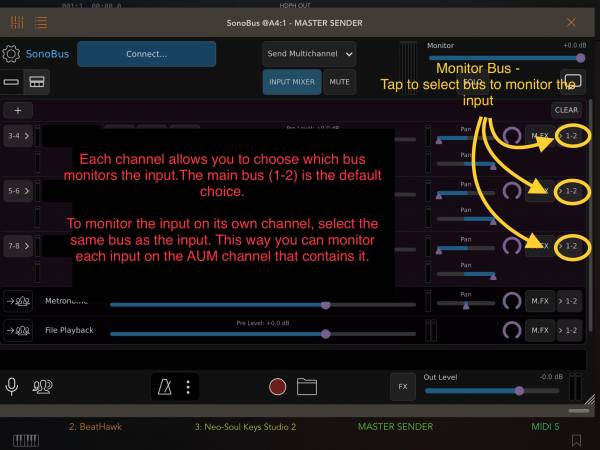
 MONITORING SETUP
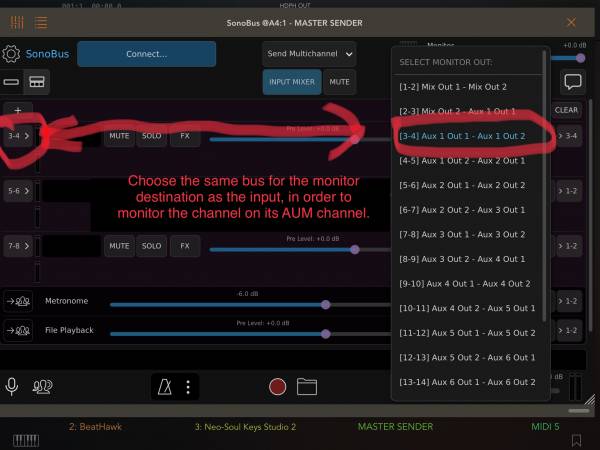
By default, each input is monitored by the main Sonobus instance (the sender) rather than on its own bus. It is usually convenient to have each input monitored on its original bus. The pictures below demonstrate how to set this up.
